

Portal Guide
Create and Manage References
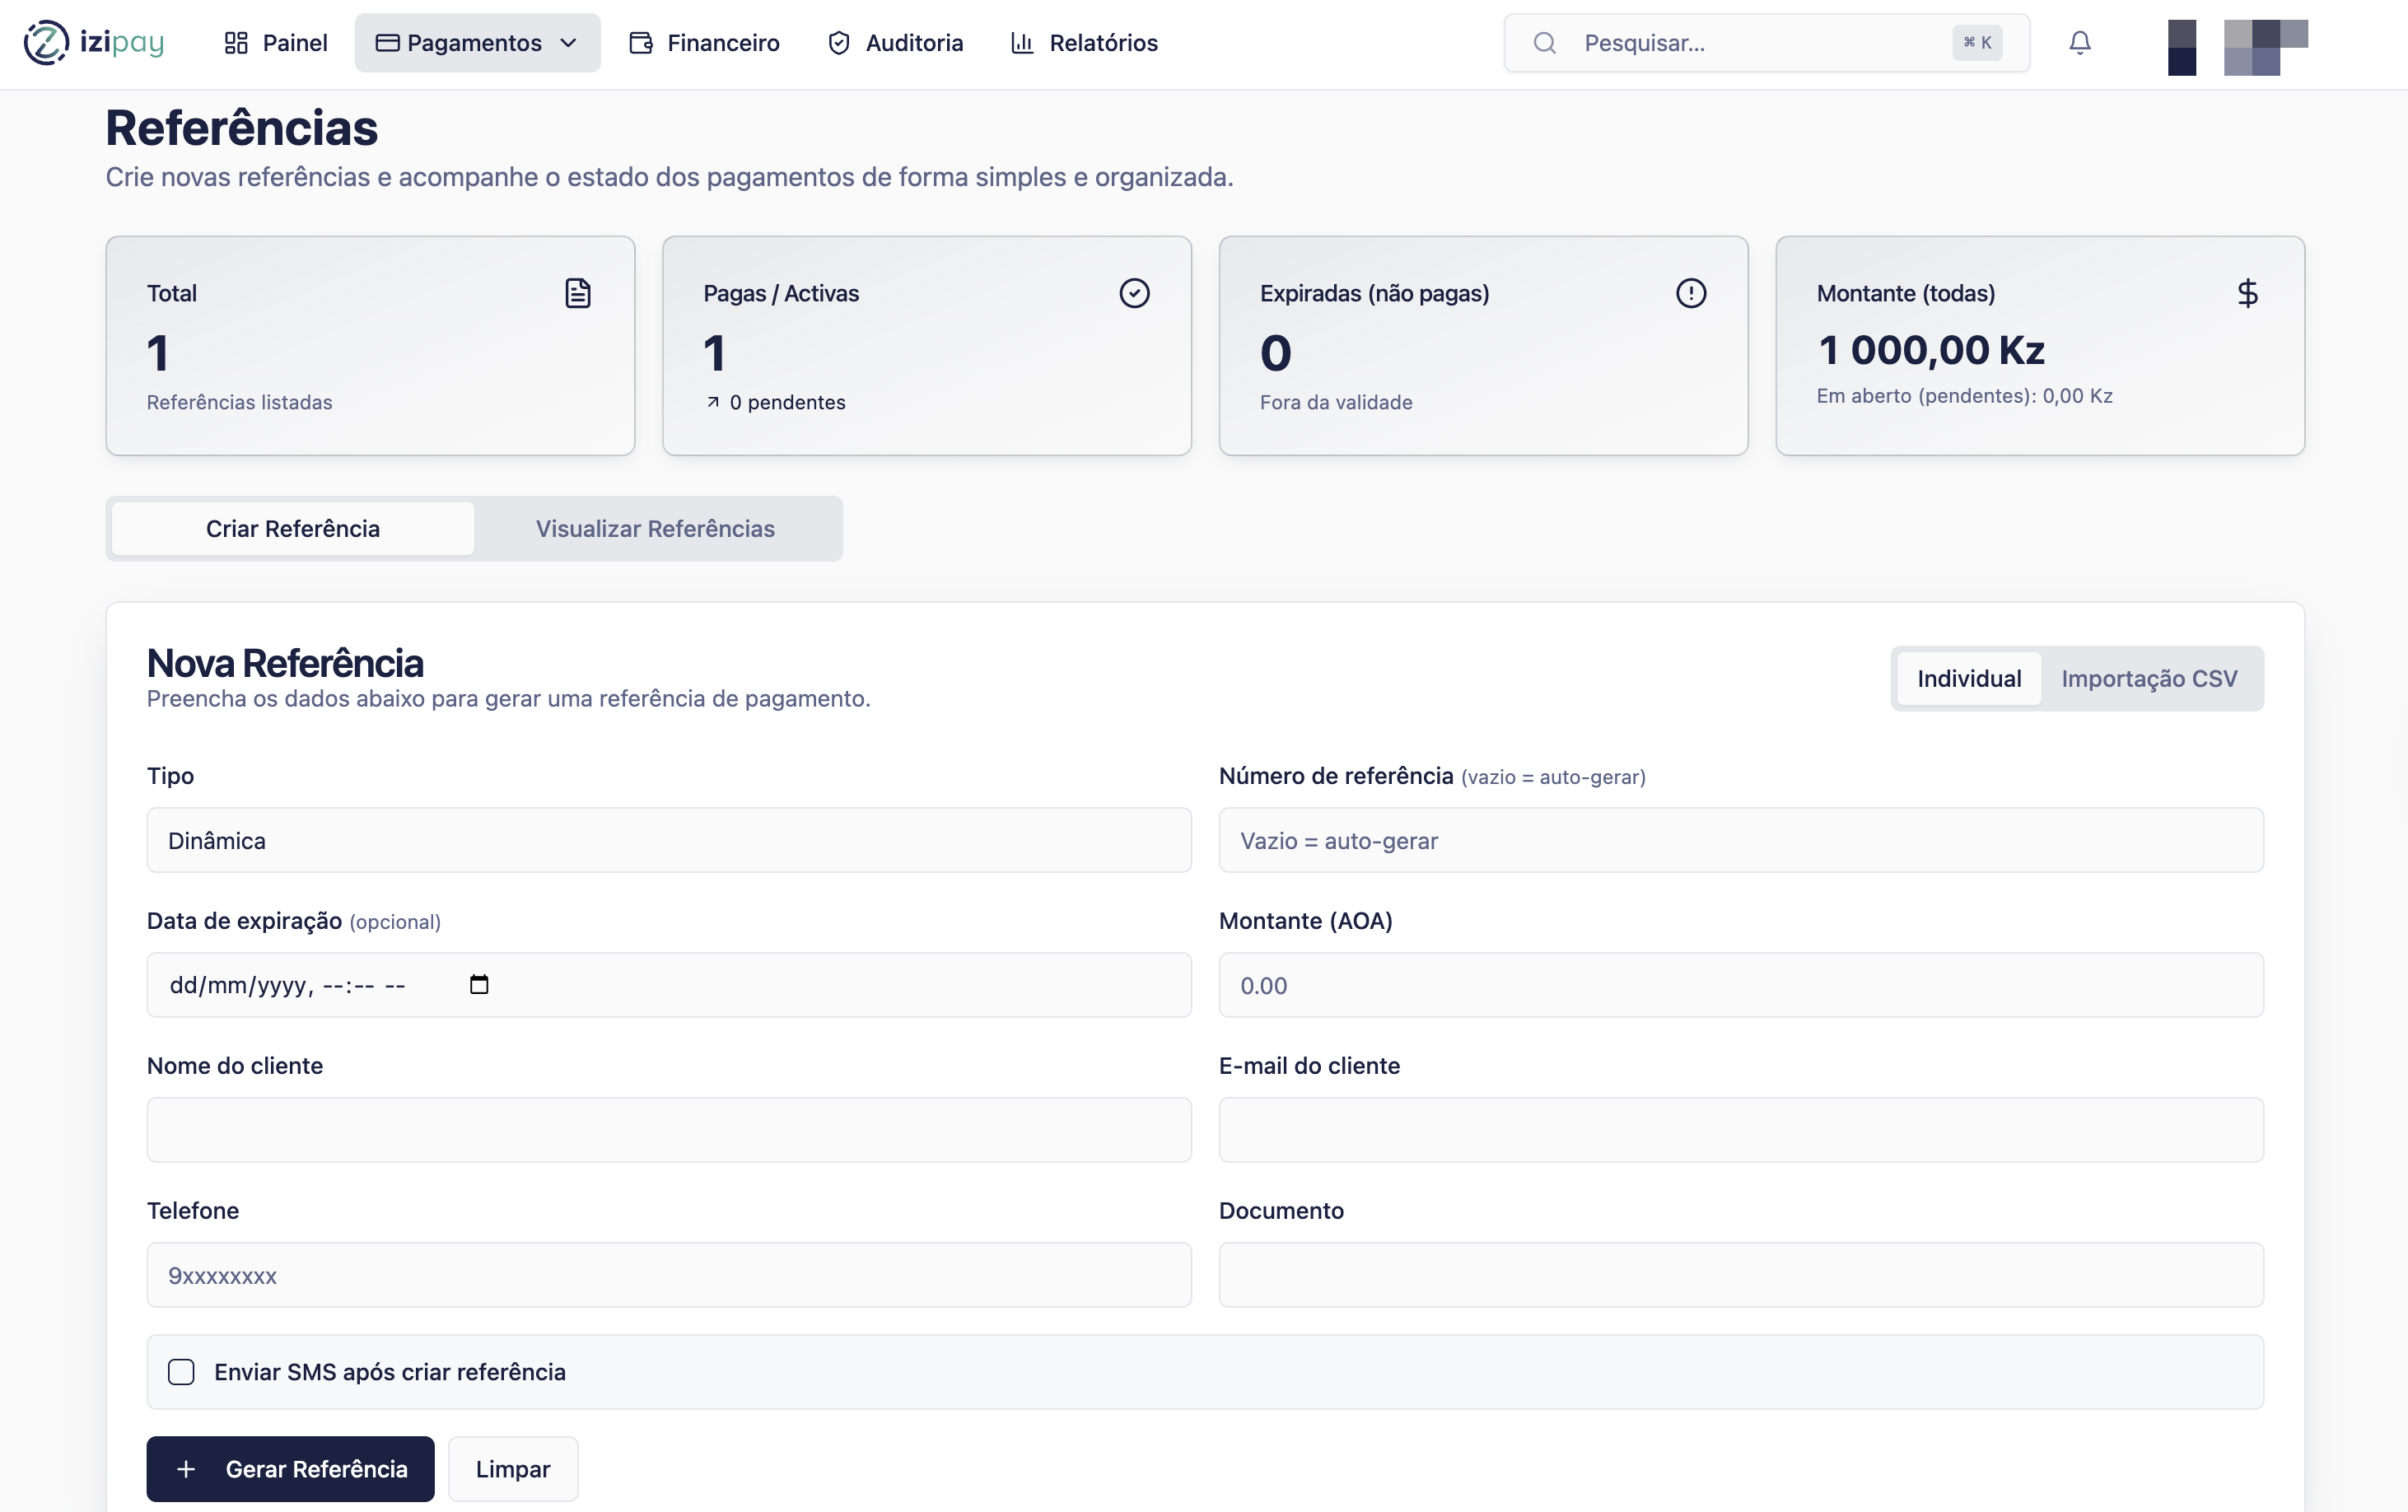
Use Referências when a customer needs payment instructions they can use later through a supported payment channel.
Before you start
- Confirm the amount, customer contact, and expiration date.
- Decide whether the reference is dynamic, charging, or invoice-based if the portal asks.
- Keep the generated entity and reference together; customers need both.
Reference fields
Entity
The payment entity shown to the customer together with the reference.
Reference
The unique number the customer uses to pay.
Amount
The amount expected for this reference.
Expiration
The last valid date and time for payment.
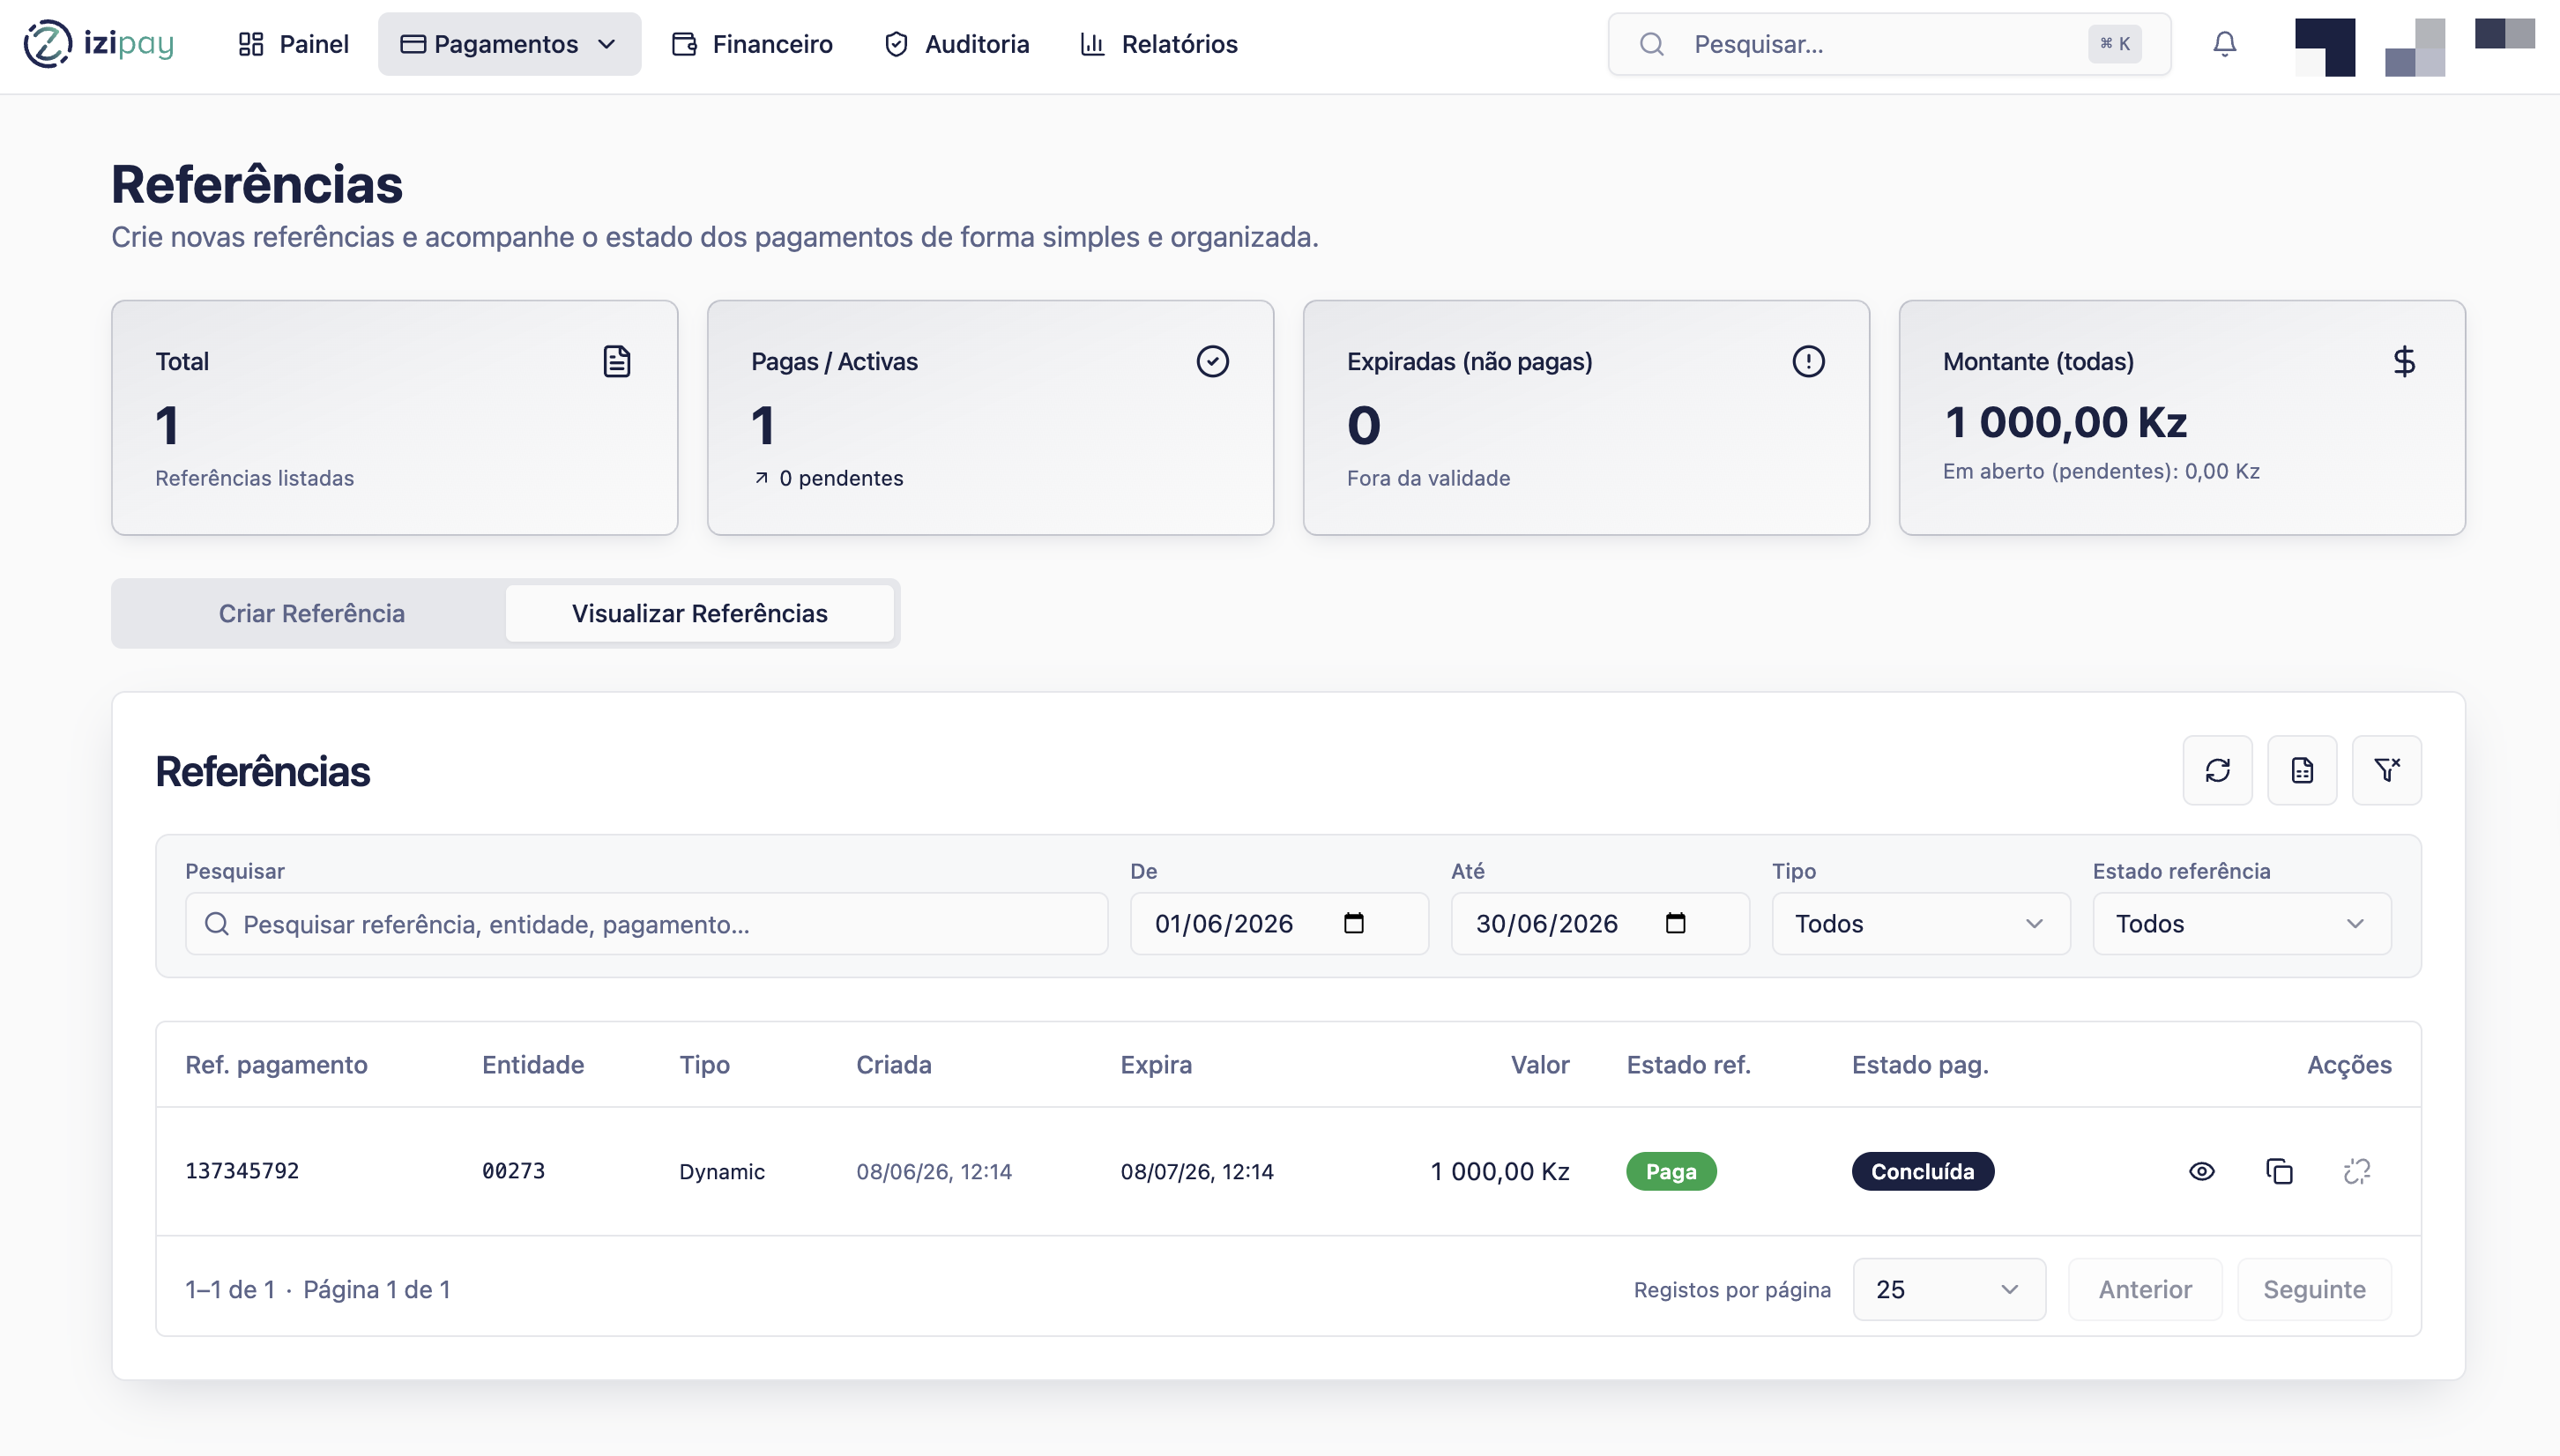
Status
Shows whether the reference is pending, paid, expired, or cancelled.
Step by step
- Open Referências.
- Choose the reference type if required.
- Enter the amount and customer details.
- Set or confirm the expiration date.
- Create the reference.
- Copy the payment instructions.
- Send the instructions to the customer.
- Track the reference status until it is paid or expires.
Reference creation checklist
0 of 5 complete
0%
What the customer receives
Sample reference instructions
Payment by reference
Entity: [entity]
Reference: [reference]
Amount: [amount] AOA
Valid until: [expiration]
Please send proof only if requested. The merchant will confirm status in the portal.
How to confirm success
Success signs
- The reference status is paid.
- The paid date is visible.
- The payment can be found in Histórico de Pagamentos.
Common fixes
- If the reference expires, create a new reference.
- If the customer used the wrong amount, contact Helpdesk with the payment details.
- If a pending reference should no longer be used, cancel it when the portal allows cancellation.
Last modified on