

Portal Guide
Create a QR Payment
Use Código QR when the customer should scan a code and complete the payment from their own phone.
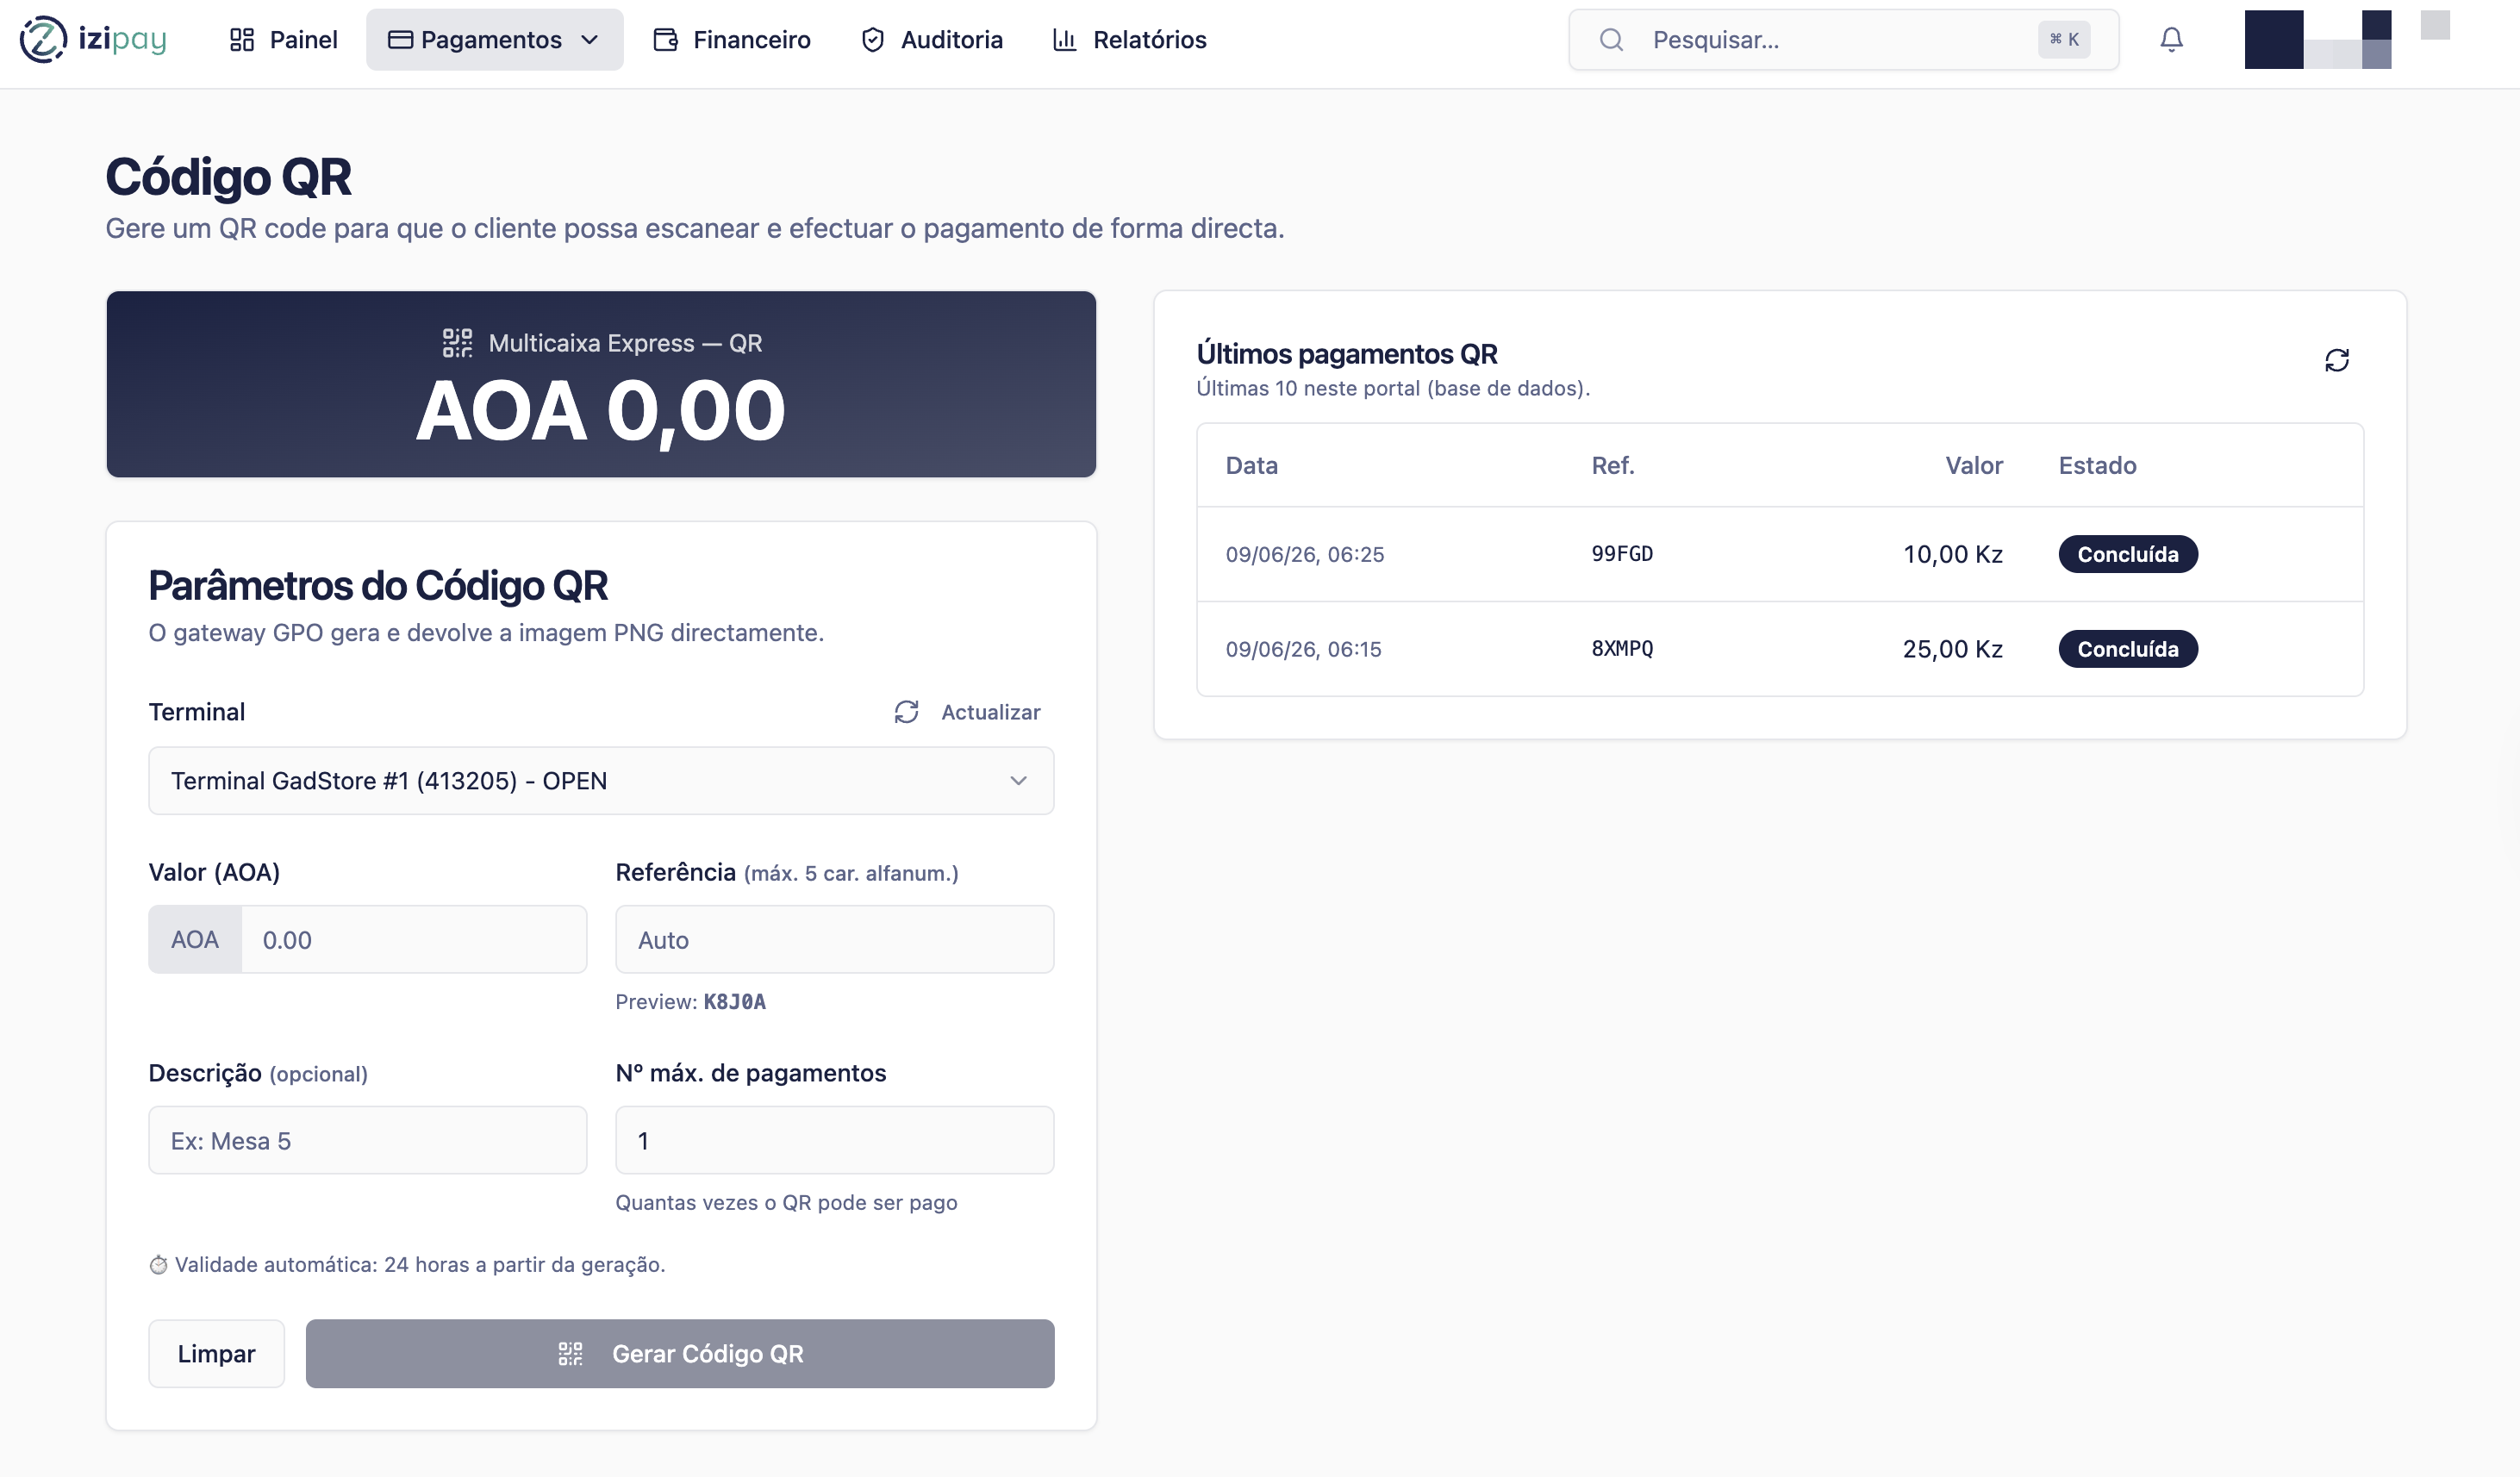
Before you start
- Confirm the amount with the customer.
- Keep the QR code visible on your screen or printed material.
- Ask the customer to use their mobile payment app or supported scanner.
Fields you may see
Amount
The amount attached to the QR payment.
Reference
The identifier used to track this QR payment.
Expiration
The time window during which the QR code can be paid.
Step by step
- Open Código QR from the payments menu.
- Enter the amount and any required reference details.
- Generate the QR code.
- Show the QR code to the customer.
- Ask the customer to scan and approve the payment.
- Wait for the portal to confirm the payment status.
QR payment checklist
0 of 4 complete
0%
What the customer sees
The customer scans the QR code, reviews the payment information, and approves the payment in their mobile channel.
Short instruction for the customer
Please scan this IZI Pay QR code and confirm the payment on your phone.
Wait until I confirm the payment status in the portal.
How to confirm success
Success signs
- The payment status changes to paid or completed.
- The QR payment appears in Histórico de Pagamentos.
- The amount matches the sale amount.
Common fixes
- If the QR code expires, generate a new one.
- If the scanner cannot read the code, increase screen brightness or regenerate it.
- If the payment remains pending, refresh the status before completing the sale.
Last modified on